Recent Posts
Heart Health and a Healthy Home: Keeping Your Environment Safe
2/12/2025 (Permalink)
 February is American Heart Month—a time to raise awareness about cardiovascular health and how to protect your heart.
February is American Heart Month—a time to raise awareness about cardiovascular health and how to protect your heart.
While diet, exercise, and regular check-ups are critical to maintaining a healthy heart, your home environment also plays a significant role in your overall well-being.
From indoor air quality to stress reduction, ensuring your home is a healthy space can positively impact your heart health. Let’s explore the connection between a healthy home and a healthy heart, along with practical steps you can take to support both.
Prioritize Indoor Air Quality
Poor indoor air quality can exacerbate respiratory conditions, increase stress levels, and affect cardiovascular health. Dust, mold, and airborne pollutants can trigger inflammation and put a strain on your heart.
Heart-Healthy Home Tips:
- Clean Regularly: Dust surfaces, vacuum with a HEPA filter, and wash bedding to reduce allergens.
- Control Humidity: Use a dehumidifier to prevent mold growth and keep indoor humidity between 30-50%.
- Change Air Filters: Replace HVAC filters every 1-3 months to ensure clean air circulation.
- Open Windows: Allow fresh air to flow through your home when weather permits.
Reduce Stress by Decluttering
Cluttered spaces can contribute to feelings of overwhelm and stress, which are harmful to heart health. Chronic stress increases blood pressure and puts unnecessary strain on your heart.
- Declutter Daily: Spend 10 minutes each day tidying up your space.
- Organize for Functionality: Arrange items so they’re easy to find and put away.
- Create Relaxation Zones: Dedicate areas for unwinding, such as a cozy reading nook or meditation corner.
Keep Your Home Mold-Free
High humidity and water damage are the usual culprits behind mold growth.
- Address Water Damage Promptly: Leaks and floods should be fixed immediately to prevent mold.
- Use Exhaust Fans: Ventilate kitchens, bathrooms, and laundry rooms to reduce moisture buildup.
- Monitor for Mold: Inspect hidden areas, like behind appliances and under sinks, for signs of growth.
Reduce Chemical Exposure
Many cleaning products and air fresheners contain volatile organic compounds (VOCs) that can affect your health. Exposure to these chemicals may increase inflammation and stress on your body, including your heart.
Heart-Healthy Home Tips:
- Opt for Natural Cleaners: Use vinegar, baking soda, and lemon for non-toxic cleaning solutions.
- Read Labels: Choose products labeled “low-VOC” or “fragrance-free.”
- Ventilate When Cleaning: Open windows and run fans to improve airflow.
Build a Safe and Supportive Environment
A safe, well-maintained home reduces risks that can cause stress or injuries. Slip-and-fall hazards, fire risks, and inadequate lighting can create dangerous situations, increasing your anxiety and affecting your heart health.
Heart-Healthy Home Tips:
- Install Smoke Detectors: Ensure alarms are functional and placed in key areas.
- Eliminate Trip Hazards: Secure loose rugs and remove clutter from floors.
- Improve Lighting: Use adequate lighting to reduce strain on your eyes and make your space safer.
Your Heart Deserves a Healthy Home
A heart-healthy lifestyle isn’t just about what you eat or how much you exercise—it’s also about creating an environment that supports your well-being. By making your home a safe, clean, and stress-free space, you can contribute to your cardiovascular health and enjoy greater peace of mind.
Our team of professionals specializes in restoring homes to safe, healthy conditions.
As a trusted leader in the restoration industry, SERVPRO of Framingham has the advanced training and equipment needed to restore your home and business.
Preparing Your Home or Business for Storm Season
1/21/2025 (Permalink)
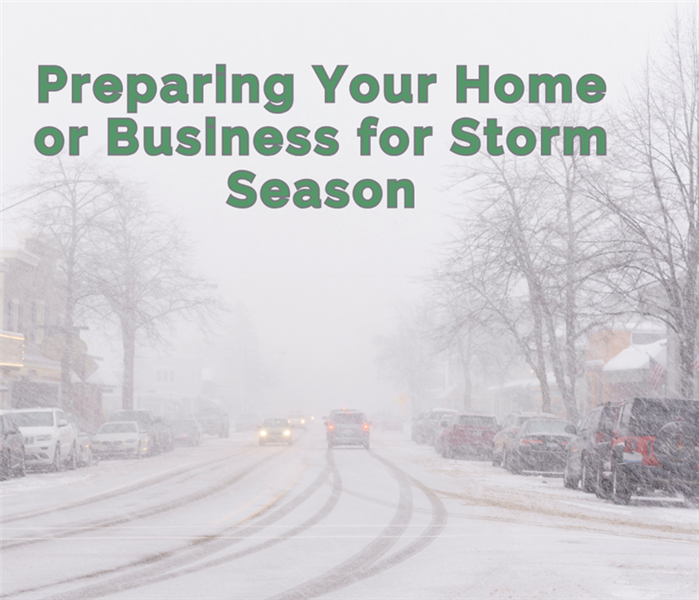 Storm season can bring unexpected challenges, but with proper preparation, you can protect your property and minimize potential damage.
Storm season can bring unexpected challenges, but with proper preparation, you can protect your property and minimize potential damage.
Steps to Fortify Your Property
- Seal windows and doors: Prevent water intrusion by checking for gaps and using weatherproofing materials.
- Maintain gutters and downspouts: Clear debris to ensure proper water drainage.
- Secure outdoor items: Bring in or anchor down furniture, tools, and equipment to prevent wind damage.
The Importance of an Emergency Plan
Prepare a plan that includes:
- Emergency contacts and SERVPRO’s number for quick restoration services.
- An evacuation route and a safe space for shelter.
- An inventory of important documents and valuables.
SERVPRO’s Storm Damage Cleanup and Restoration Services
From floodwaters to wind damage, we specialize in restoring properties after severe storms. Our fast response minimizes downtime and damage.
As a trusted leader in the restoration industry, SERVPRO of Framingham has the advanced training and equipment needed to restore your home and business.
Fire Damage: What to Do Before Help Arrives
1/16/2025 (Permalink)
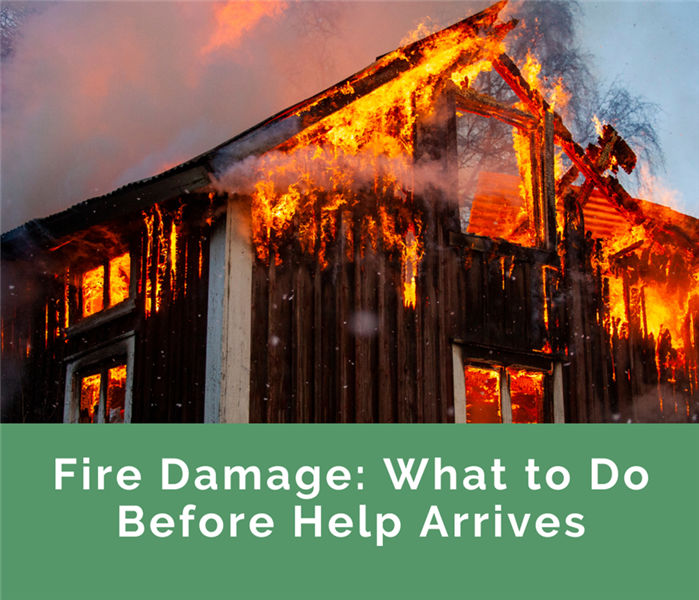 A fire can be devastating, but knowing what to do in the aftermath can make a huge difference.
A fire can be devastating, but knowing what to do in the aftermath can make a huge difference. Here’s a guide to managing fire damage safely until our team arrives.
1. Prioritize Safety
Your safety comes first. Avoid re-entering the property until it’s declared safe by the fire department. Structural instability, smoke inhalation, and electrical hazards can pose serious risks.
2. Document Damage for Insurance
Take photos and videos of the damage as soon as it’s safe. Documenting the extent of the fire damage helps with insurance claims and ensures proper compensation.
3. Avoid DIY Cleaning
Smoke and soot damage require specialized cleaning methods. Attempting to clean affected areas yourself can spread contaminants or cause further damage. Leave the restoration to experts.
4. Fire and Smoke Restoration Expertise
Once on-site, we will assess the damage, create a restoration plan, and begin cleaning, deodorizing, and repairing your property. Their team is equipped to handle even the most severe fire damage.
As a trusted leader in the restoration industry, SERVPRO of Framingham has the advanced training and equipment needed to restore your home and business.
The Hidden Dangers of Mold and How We Can Help
1/9/2025 (Permalink)
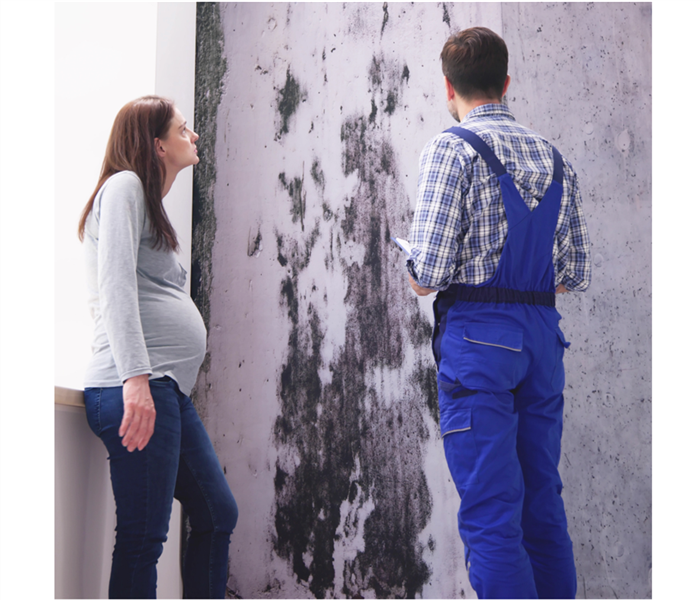 Here’s what you need to know about the dangers of mold and how we can help.
Mold might start as a small annoyance, but it can grow into a significant structural hazard if left untreated. Here’s what you need to know about the dangers of mold and how we can help.
Common Causes of Mold in Homes and Businesses
Mold thrives in damp, humid environments, making it a frequent issue after water damage, plumbing leaks, or poor ventilation. Bathrooms, basements, and areas with condensation are particularly vulnerable.
Signs You Need Professional Mold Removal
- Persistent musty odors.
- Discoloration on walls, ceilings, or floors.
SERVPRO’s Comprehensive Mold Remediation Process
SERVPRO’s trained technicians don’t just clean mold—they eliminate it at the source. Their process includes:
- A thorough assessment to identify the extent of the mold problem.
- Containment to prevent mold spores from spreading.
- Advanced cleaning techniques to remove mold safely and effectively.
- Repairs to restore your property to its pre-mold condition.
Preventive Tips to Keep Mold Away
- Keep humidity levels below 60%.
- Fix leaks and address water damage immediately.
- Ensure proper ventilation in moisture-prone areas.
As a trusted leader in the restoration industry, SERVPRO of Framingham has the advanced training and equipment needed to restore your home and business.
Top 5 Reasons to Call Us After Water Damage
1/1/2025 (Permalink)
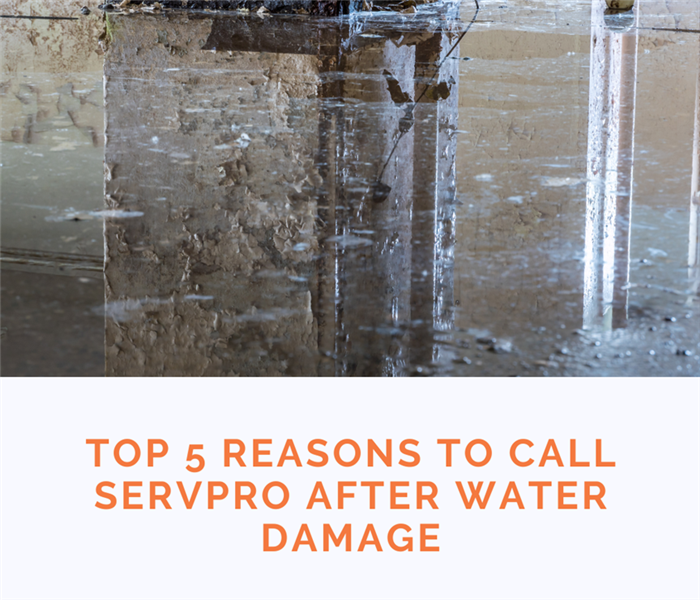 Water damage can strike unexpectedly, leaving your home or business vulnerable to long-term consequences if not addressed promptly.
Water damage can strike unexpectedly, leaving your home or business vulnerable to long-term consequences if not addressed promptly. Here’s why calling us after water damage is the smartest choice you can make.
1. Immediate Action Prevents Mold Growth
Water damage can quickly lead to mold growth, sometimes within 24-48 hours. Our team understands the urgency and responds fast to mitigate damage and prevent mold before it becomes a bigger problem.
2. Specialized Water Extraction and Drying Technology
We use industry-leading technology to tackle water damage. From powerful pumps to advanced drying equipment, their tools ensure every drop of water is removed—even from hidden areas like behind walls or under floors. This thorough approach minimizes the risk of further structural damage.
3. Expertise That Ensures Peace of Mind
With years of experience in water restoration, our trained professionals know exactly how to handle every unique situation. From minor leaks to major floods, they provide expert care to restore your property efficiently and safely.
4. Assistance With Insurance Claims
Navigating insurance claims after water damage can be overwhelming. We work closely with insurance providers to streamline the claims process. Their detailed documentation and expertise help you get the compensation you deserve.
5. Real Stories of Restored Homes and Businesses
Countless property owners have trusted us to restore their homes and businesses after water damage. From a homeowner whose basement was saved after a pipe burst to a business that reopened quickly after storm flooding, our results speak for themselves.
Don’t let water damage wreak havoc on your property. As a trusted leader in the restoration industry, SERVPRO of Framingham has the advanced training and equipment needed to restore your home and business.
Commercial Restoration: Protecting Your Business from Disaster and Getting Back on Track
12/17/2024 (Permalink)
 When a business faces unexpected damage from water, fire, mold, or severe weather, the impact can be overwhelming.
When a business faces unexpected damage from water, fire, mold, or severe weather, the impact can be overwhelming. Not only does it disrupt daily operations, but it also affects employees, customers, and bottom-line profits. Commercial restoration is essential for businesses to bounce back quickly after a disaster. Here’s a guide to understanding the commercial restoration process, common types of damage, and how to protect your business for the future.
Why Commercial Restoration Matters
Every hour your business remains closed due to damage is an hour of lost revenue and productivity. The quicker you can address the damage and get back up and running, the less impact it will have on your company’s success. Restoration experts not only handle the cleanup and repair but also ensure a safe and healthy environment, so your team and customers can feel confident returning.
Common Types of Commercial Damage
- Water Damage
- Causes: Burst pipes, roof leaks, flooding, or faulty sprinklers.
- Impact: Water damage can quickly lead to mold growth, structural damage, and ruined inventory or equipment.
- Restoration Process: Water extraction, drying, dehumidification, and monitoring to ensure moisture is fully removed from the building.
- Fire and Smoke Damage
- Causes: Electrical fires, kitchen fires (especially in restaurants), or accidents in industrial spaces.
- Impact: Fire damage is often accompanied by smoke and soot, which can penetrate surfaces and leave behind lingering odors and health hazards.
- Restoration Process: Removing soot, deodorizing, and deep-cleaning, with specialized techniques to prevent further damage to walls, equipment, and furniture.
- Mold and Fungal Growth
- Causes: High humidity, previous water damage, or inadequate ventilation.
- Impact: Mold not only causes damage to walls, floors, and HVAC systems but also poses health risks, particularly in workplaces.
- Restoration Process: Mold containment, air filtration, and removal, followed by steps to prevent future mold issues.
- Storm and Wind Damage
- Causes: Severe weather, including hurricanes, tornadoes, and heavy rains.
- Impact: Damage can range from broken windows and roof leaks to downed trees and flooded basements.
- Restoration Process: Repairs to damaged structures, water extraction, debris removal, and any necessary construction.
The Commercial Restoration Process: What to Expect
Commercial restoration is a comprehensive process that varies depending on the type and severity of damage. Here are the main stages:
- Assessment and Inspection
- Professionals conduct an on-site evaluation, identifying the extent of the damage and creating a customized restoration plan.
- This assessment often includes moisture mapping, air quality testing, and structural inspections.
- Mitigation and Containment
- Swift action is crucial to prevent further damage. Mitigation efforts can include boarding up windows, covering roofs, and placing barriers to contain affected areas.
- For water and mold, this stage involves extracting standing water and setting up dehumidifiers to prevent mold growth.
- Cleanup and Removal
- All damaged materials, from flooring and drywall to furniture and equipment, are removed as needed.
- Soot, ash, mold, and water residue are cleaned using specialized equipment, ensuring that affected areas are safe.
- Restoration and Repair
- This phase involves repairing and replacing damaged areas, from repainting walls to rebuilding parts of the structure.
- Restoration can also include deodorizing to remove any smoke or mold odors, as well as refinishing floors and walls.
- Final Inspection and Prevention Recommendations
- Before you re-open, restoration specialists will conduct a final inspection to ensure the property is fully restored and safe.
- Many professionals also offer recommendations on future preventative measures, such as moisture control or fireproofing upgrades.
Choosing a Reliable Commercial Restoration Partner
When selecting a restoration service, prioritize companies with experience in commercial properties, as they’ll understand the unique challenges that come with business restoration. Look for a team that offers:
- 24/7 Availability: Damage can happen at any time, and the sooner restoration starts, the better.
- Specialized Equipment and Techniques: Commercial properties often require more advanced equipment and processes than residential spaces.
- Experience in Commercial Codes and Regulations: Compliance with local codes is essential, especially in sectors like food service and healthcare.
- Project Management Support: Commercial restoration is complex and may involve coordinating multiple contractors, permits, and inspections. A capable restoration partner will guide you through each step.
Preparing Your Business for Future Disasters
To reduce the risk of severe damage and downtime, consider implementing these preventative measures:
- Regular Maintenance: Schedule routine inspections for plumbing, HVAC, roofing, and electrical systems to catch potential problems early.
- Waterproofing and Drainage Solutions: Seal any cracks in the foundation, ensure proper drainage around the property, and consider water-resistant barriers.
- Create a Disaster Preparedness Plan: Develop a clear emergency plan that includes evacuation routes, emergency contacts, and procedures for securing equipment and data.
- Fire Safety Systems: Ensure all fire alarms, sprinklers, and extinguishers are regularly inspected and meet current standards.
- Insurance Review: Check that your commercial insurance policy adequately covers potential risks and includes coverage for business interruption.
Facing a disaster is a daunting prospect for any business owner, but with the right restoration team and preventive measures, you can protect your business, minimize damage, and recover quickly. Whether it’s water, fire, mold, or storm damage, proactive planning and quick action are key to getting your business back to normal with as little disruption as possible.
As a trusted leader in the restoration industry, SERVPRO of Framingham has the advanced training and equipment needed to restore your business.
Frozen Pipes and Ice Dams: What to Do If You Return to Winter Water Damage
12/10/2024 (Permalink)
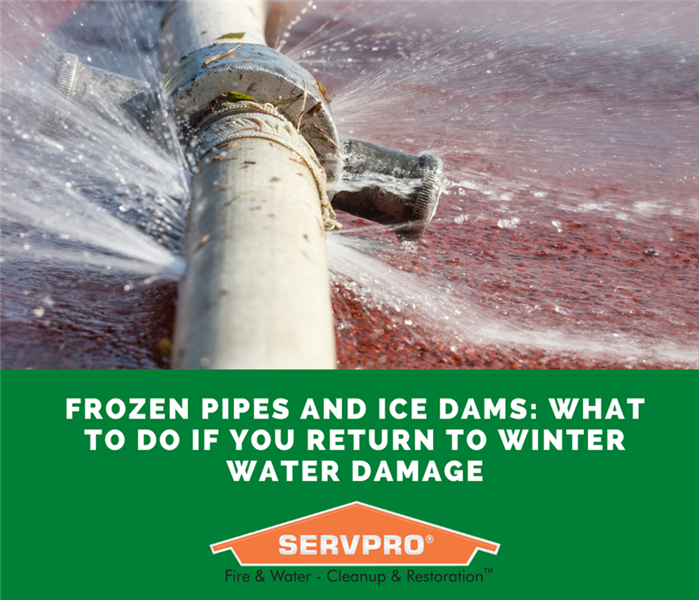 When temperatures drop, frozen pipes and ice dams can cause leaks and water damage, creating costly repairs if left unchecked.
Winter vacations are a great way to unwind, but returning home to frozen pipes or water damage is anything but relaxing. When temperatures drop, frozen pipes and ice dams can cause leaks and water damage, creating costly repairs if left unchecked. Here’s what you need to know to identify and address these winter hazards in your home—and steps to take to prevent future issues.
1. Understanding the Risks: Frozen Pipes and Ice Dams
- Frozen Pipes: When temperatures dip, water in your pipes can freeze and expand, causing pipes to crack or burst. Once they thaw, water can flood the area, causing extensive damage.
- Ice Dams: Ice dams form when snow melts on your roof but refreezes at the edge, creating a barrier that prevents further runoff. The trapped water then seeps into your home, damaging walls, ceilings, and insulation.
2. Signs of Frozen Pipes or Ice Dam Damage
Start by walking through your home and looking for telltale signs of damage:
- Water Stains on Walls or Ceilings: These could indicate leaks caused by melting ice dams.
- Low Water Pressure: If your faucets have weak flow, it may signal frozen pipes blocking water flow.
- Pooling Water or Dampness: Check areas near exterior walls, in basements, or under sinks for unexpected moisture.
- Frost on Pipes: Pipes in unheated areas like basements, attics, or crawl spaces may have visible frost if they’ve frozen.
3. Immediate Steps to Take
If you suspect or find water damage, it’s crucial to act quickly. Here’s how to minimize further damage and start the restoration process:
- Shut Off the Water: Turn off the main water supply to prevent further leaks if you see a burst or leaking pipe.
- Turn Off the Power to Affected Areas: Water and electricity are a dangerous mix. If there’s significant flooding, shut off the power to the affected rooms before going in.
- Drain Your Pipes: Open all faucets to release any remaining water and relieve pressure in the pipes.
- Mop Up Standing Water: Use towels or a wet-dry vacuum to soak up any standing water, especially on carpets or hardwood floors, to prevent mold growth.
4. Thawing Frozen Pipes
If your pipes are frozen but not burst, follow these tips to thaw them safely:
- Apply Heat Gradually: Use a space heater, hair dryer, or heating pad to thaw frozen pipes gently. Avoid using open flames or extreme heat, which can damage pipes.
- Focus on Exposed Pipes First: Start with pipes you can easily access, then work towards harder-to-reach areas.
- Keep Faucets Open: Running a small trickle of water through faucets can help pipes thaw more quickly by encouraging water flow.
5. Addressing Ice Dam Water Damage
Ice dams can cause water to seep through your roof and down walls, leading to hidden damage and mold. Here’s what to do:
- Inspect Attic Insulation: Wet or damaged insulation is a common sign of ice dam damage. Remove and replace any soaked insulation to prevent mold.
- Check Walls and Ceilings: Look for damp spots or discoloration and address them quickly to prevent further deterioration.
- Use a Dehumidifier: After removing standing water, set up a dehumidifier to dry out any remaining moisture in walls or ceilings.
6. When to Call in the Pros
While you can address minor water damage yourself, it’s wise to contact professionals if:
- You have significant flooding or water damage that’s beyond DIY cleanup.
- Mold has started to grow.
- Water has seeped into electrical systems or insulation, creating potential hazards.
Professional water damage restoration teams have specialized tools like moisture meters, industrial fans, and dehumidifiers that can speed up the drying process and ensure thorough restoration.
7. Preventing Future Frozen Pipes and Ice Dams
A few simple steps can help protect your home from winter water damage:
- Insulate Pipes: Wrap exposed pipes with foam or insulation tape to keep them warmer in freezing temperatures.
- Allow Faucets to Drip: On extremely cold nights, leave faucets slightly open to prevent freezing.
- Maintain Attic Insulation and Ventilation: Proper insulation helps keep your attic cold, preventing snow on your roof from melting too quickly and refreezing.
- Clear Your Gutters: Keep gutters clear of debris so melting snow can flow freely instead of pooling and forming ice dams.
8. Take Precautions Before Winter Travels
Before you leave for a winter trip, take these steps to protect your home:
- Set Your Thermostat: Keep your thermostat at a minimum of 55°F to ensure your home stays warm enough to prevent freezing.
- Turn Off the Main Water Supply: If possible, shut off the water and drain pipes before you leave to prevent leaks if a pipe does freeze.
- Open Cabinet Doors: Allow warm air to circulate around pipes under sinks and in unheated areas by leaving cabinet doors open.
Returning from a relaxing winter getaway to find water damage can be frustrating, but acting quickly can prevent minor issues from turning into costly repairs. Following these tips to spot, address, and prevent frozen pipes and ice dam damage can help you restore your home swiftly and safeguard it from future winter mishaps.
As a trusted leader in the restoration industry, SERVPRO of Framingham has the advanced training and equipment needed to restore your home and business.
Home Restoration 101: Recovering from Holiday Cooking Mishaps and Kitchen Fires
12/4/2024 (Permalink)
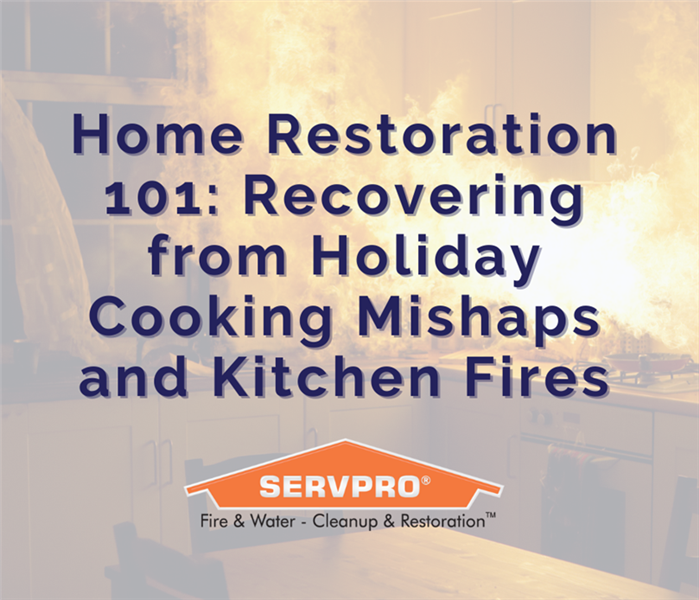 As a trusted leader in the restoration industry, SERVPRO of Framingham has the advanced training and equipment needed to restore your home.
The holiday season is a time for family gatherings, feasts, and, unfortunately, an increase in cooking-related fires. With the kitchen bustling more than usual, accidents can happen, from minor mishaps to small kitchen fires. Knowing how to prevent and respond to these incidents—and how to recover from any damage—can save you time, stress, and money. Here’s your guide to preventing holiday cooking mishaps and restoring your kitchen if the unexpected happens.
Preventing Holiday Cooking Fires
Before diving into restoration tips, it’s essential to know how to minimize the risk of a cooking fire in the first place. Here are some key precautions:
- Stay Present and Alert in the Kitchen
With so many holiday activities going on, it’s easy to get distracted. Make it a rule to never leave a hot stovetop or oven unattended. If you need to step away, turn off the heat temporarily. - Avoid Cooking with Loose Clothing
Loose clothing or long sleeves can catch fire easily. Opt for snug, short-sleeved attire or roll up your sleeves when cooking. - Keep Flammable Items Away from Heat Sources
Make sure that towels, paper towels, and wooden utensils are kept far from open flames or hot surfaces. A clear workspace can help prevent accidental fires. - Have a Fire Extinguisher on Hand
In the event of a small kitchen fire, a fire extinguisher within reach can quickly contain the flames. Make sure your extinguisher is rated for kitchen use and know how to operate it. - Be Cautious with Oil and Grease
Grease fires are one of the most common causes of kitchen fires. If you’re cooking with oil, watch it carefully, as it can quickly overheat. Remember: never use water on a grease fire, as it can make the flames spread.
Immediate Steps if a Cooking Fire Occurs
Even with precautions, cooking accidents can still happen. If a fire starts, here’s what to do:
- Turn Off the Heat Source
For a stovetop fire, immediately turn off the burner. If it’s an oven fire, turn off the heat and keep the door closed to starve the flames of oxygen. - Use a Lid or Baking Sheet
For small stovetop fires, cover the pan with a metal lid or baking sheet to suffocate the flames. Never use water or flour, as both can worsen the fire. - Use a Fire Extinguisher if Needed
If the flames are too large to handle with a lid, use a fire extinguisher to put it out. Call emergency services if the fire gets out of control. - Ventilate the Area
After putting out the fire, open windows or use fans to clear out any smoke and lingering fumes. Avoid turning on your kitchen vent hood until it’s been checked for damage.
Recovering from Fire or Smoke Damage in Your Kitchen
If a cooking mishap leaves you with fire or smoke damage, don’t worry—there are effective steps you can take to restore your kitchen to its former glory.
1. Assess the Extent of the Damage
Start by examining the affected areas closely. Soot and smoke stains can sometimes look worse than they are, so determine if the damage is superficial or if deeper cleaning and repairs are necessary.
2. Clear Out Soot and Smoke Residue
Soot on Surfaces: Use a vacuum with a brush attachment to remove loose soot from surfaces. Avoid wiping, as it can smear the soot and make it harder to clean.
Smoke Residue: For counters, walls, and cabinets, mix a solution of water, vinegar, and a mild detergent. Apply it with a sponge or cloth, using gentle, circular motions. Rinse the surfaces with clean water to remove residue, and repeat if necessary.
3. Address Lingering Smoke Odors
Ventilation: Open all windows and use fans to create cross-ventilation. Let fresh air circulate as much as possible.
Baking Soda and Vinegar: Sprinkle baking soda on soft surfaces like upholstery or carpets to absorb odors. For cabinets and walls, wipe down with a vinegar solution.
Activated Charcoal or Air Purifiers: Place activated charcoal or use air purifiers with HEPA filters in the kitchen. Both can help neutralize smoke odors over time.
4. Deep Clean Kitchen Appliances
Oven and Stovetop: If the fire started in your oven, follow your appliance’s manual for deep cleaning recommendations. Avoid harsh chemicals that can release fumes when heated again.
Vent Hood and Filters: Smoke and grease can accumulate in the range hood, creating lingering smells. Remove and clean the vent filters, replacing them if necessary.
5. Consider Professional Help for Extensive Damage
If smoke damage extends beyond the kitchen or has penetrated walls and ceilings, calling in a professional restoration service might be necessary. Restoration professionals can effectively remove stubborn smoke residues and lingering odors with specialized equipment and techniques.
6. Repairing Damaged Areas
Cabinet and Counter Repairs: If your cabinets or counters sustained burns or stains that won’t come out, you may need to sand, repaint, or replace them. Simple cabinet repairs can often restore them to a nearly new look.
Replacing Flooring: Fire and water can cause flooring to warp or stain. If minor scrubbing doesn’t help, consider patching or replacing damaged sections to fully restore your kitchen.
Preventing Future Kitchen Mishaps
To keep your kitchen safe year-round, establish a few safety routines:
- Regularly clean your oven, stovetop, and vent hood to reduce grease buildup.
- Test your smoke detectors every month to ensure they’re functioning.
- Review kitchen fire safety steps with your family so everyone knows what to do if an accident happens.
Cooking-related fires are common during the holiday season, but a few preventative measures and a solid restoration plan can make a huge difference. With these tips, you’ll be ready to handle any kitchen mishaps that come your way, ensuring a safe, festive season for you and your family.
As a trusted leader in the restoration industry, SERVPRO of Framingham has the advanced training and equipment needed to restore your home and business. Give us a call today!
Returning Home After Holiday Travel? What to Look for to Spot Water or Mold Damage Early
11/25/2024 (Permalink)
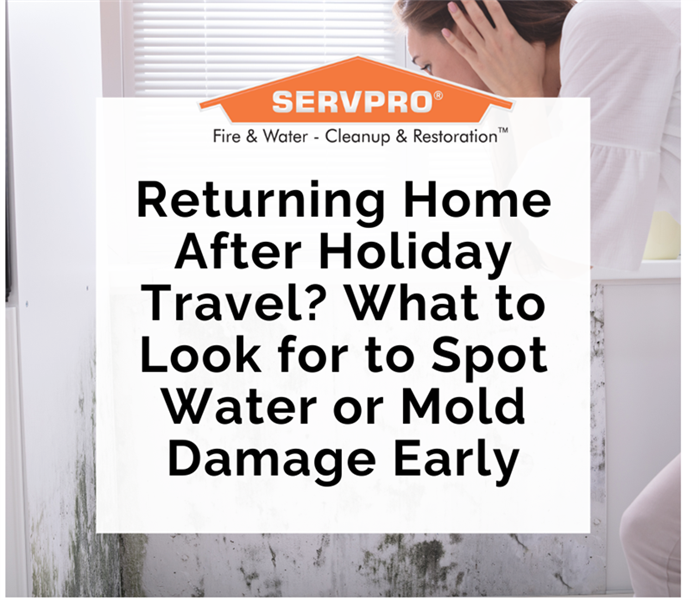 Returning home to unexpected water or mold damage can be overwhelming, but by conducting a thorough inspection and addressing any issues promptly.
Returning home after a refreshing holiday getaway can be a relief—until you notice something that doesn’t look quite right in your space. While you were away, your home may have developed issues that require quick attention, especially when it comes to water and mold damage. Spotting these early signs can help prevent further complications, allowing you to enjoy the new year stress-free. Here’s a guide to inspecting your home upon return and identifying potential water and mold damage.
1. Start with a General Walkthrough
Before you unpack, take a walk through your home and do a quick visual and sniff test. Musty odors can be the first indicator of hidden mold or water damage. As you walk around, pay special attention to rooms and areas where water or dampness is most common—such as the basement, bathroom, kitchen, and laundry room.
2. Check for Water Stains or Discoloration
Inspect your walls, ceilings, and floors for any new water stains, discoloration, or bubbling paint. Water damage often causes these visible signs, especially if there’s been a hidden leak while you were away. Any spotting or discoloration could indicate moisture intrusion, and acting fast can prevent mold growth from spreading.
3. Look Closely at Windows and Doors
Window and door frames are common culprits for moisture buildup. Check for any condensation, water stains, or warped wood around these areas. If you notice fogged or dripping windows, this could mean there’s a leak or high humidity level that may have developed into mold.
4. Inspect Under Sinks and Around Plumbing Fixtures
Make sure to check beneath all sinks, around toilets, and any exposed pipes. Look for any standing water, dampness, or signs of mold around these plumbing fixtures. Even a small leak can escalate quickly, leading to structural damage and increased mold risk.
5. Examine Appliances Carefully
Appliances like refrigerators, dishwashers, and washing machines can sometimes leak or malfunction, particularly when left unused. Inspect the area around and behind these appliances for any water pooling or mold spots. Be cautious of any musty smell around them, as it can indicate hidden water damage.
6. Peek Into the Attic and Basement
Attics and basements are often the hardest-hit areas for water and mold damage, particularly in the winter. Check your attic for signs of roof leaks, such as wet insulation or darkened wood beams. In basements, look for any signs of standing water, damp spots, or mold on walls and floors.
7. Inspect Your Roof and Gutters
Harsh winter weather can create issues in your roof and gutter system, leading to water leaks and subsequent mold growth inside your home. Head outside and take a look at your gutters and downspouts. If you see any clogging or ice dams, address them immediately to prevent water from seeping into your home’s foundation or roof.
8. Monitor Humidity Levels Indoors
Elevated humidity can encourage mold growth, especially if moisture has built up indoors while you were away. Ideally, your indoor humidity should be between 30-50%. Consider using a hygrometer to check current levels and use a dehumidifier if needed to control moisture.
9. Check for Musty or Earthy Smells
Even if you don’t see visible mold or water damage, any unusual odors could indicate hidden moisture. Mold often has a strong, musty smell, and catching it early can help you find and tackle any underlying issue before it worsens.
10. Act Quickly on Any Signs of Damage
If you notice any of these signs of water or mold damage, it’s essential to take action right away. Addressing moisture issues and mold growth quickly can save you from expensive restoration and health risks down the line. Depending on the severity, consider contacting a professional restoration service to thoroughly inspect and remediate any potential water damage or mold growth.
Preventive Measures for Future Trips
To avoid surprises after future travels, consider the following steps before leaving your home:
- Turn off the water supply if possible, especially in colder months.
- Insulate exposed pipes and winterize outdoor faucets.
- Keep your thermostat set to a temperature that prevents freezing, even if you’ll be away.
- Arrange for a trusted friend or neighbor to check on your home periodically.
Returning home to unexpected water or mold damage can be overwhelming, but by conducting a thorough inspection and addressing any issues promptly, you can prevent them from escalating. Regular maintenance and precautionary steps will keep your home in top shape, letting you focus on enjoying your time away without worrying about what awaits when you return.
As a trusted leader in the restoration industry, SERVPRO of Framingham has the advanced training and equipment needed to restore your home and business.
Dealing with Residential Water Damage: What You Need to Know and Do Next
11/20/2024 (Permalink)
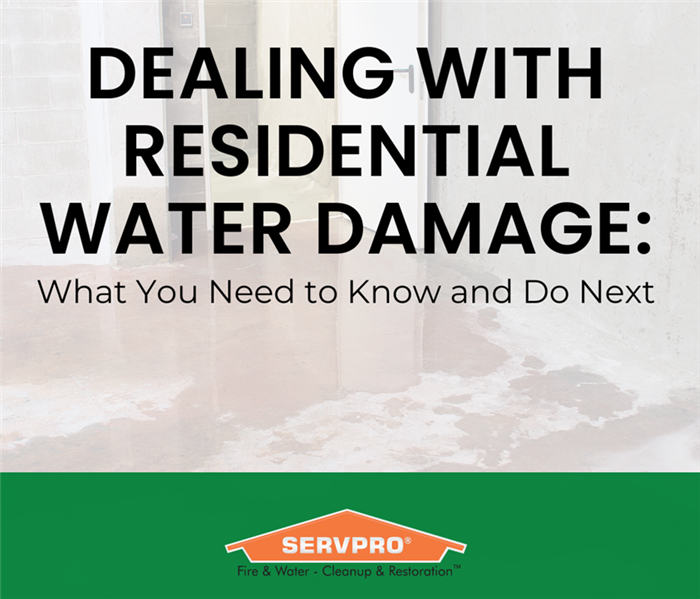 Water damage in your home can strike unexpectedly, whether due to a burst pipe, flooding, or even a roof leak.
Water damage in your home can strike unexpectedly, whether due to a burst pipe, flooding, or even a roof leak.
Regardless of the source, the effects of water damage can be far-reaching and destructive, potentially leading to structural damage, mold growth, and loss of personal property. Acting fast is crucial to minimizing the damage and starting the restoration process. Here is a guide you through the key steps for handling residential water damage and explain the importance of professional restoration services.
Step 1: Identify and Stop the Source of Water
The first thing you need to do when water damage occurs is to identify and stop the source of water intrusion. This might involve turning off the main water supply if the issue is caused by a burst pipe, or contacting your utility provider if the problem is outside your control, such as a broken water main. In the case of natural disasters like floods, wait for the water to recede and prioritize safety before entering the affected area.
Step 2: Assess the Level of Damage
Once it’s safe to enter your home, assess the level of water damage. Keep in mind that water can seep into walls, flooring, and ceilings, causing damage that isn’t immediately visible. Mold can also begin to grow within 24-48 hours, so it's important to act fast. Take photos and document the damage for insurance purposes. Depending on the severity, you may need professional help to fully understand the extent of the water damage.
Step 3: Contact Your Insurance Provider
Reach out to your homeowner's insurance provider to report the water damage and start the claims process. They will likely require a detailed report, including photographs of the damage and estimates for repairs. It's crucial to keep track of all expenses related to temporary lodging, repairs, or replacement of belongings, as these may be covered under your policy.
Step 4: Start Water Extraction and Drying
Water left standing can cause further damage to your home’s structure and create a breeding ground for mold and mildew. To prevent this, professional water extraction and drying are necessary. Restoration teams use high-powered pumps, vacuums, and industrial fans to remove standing water and dry affected areas quickly.
- Carpet and Flooring: If carpets and rugs are soaked, they will likely need to be removed and dried or replaced. Wood floors may warp or swell, requiring professional treatment to restore.
- Drywall and Insulation: Water-damaged drywall may need to be cut out and replaced to avoid mold growth. Wet insulation can also lose its effectiveness and become a health hazard, so it may need to be replaced.
Step 5: Prevent Mold Growth
Mold is a major concern following water damage, as it can develop in hidden areas like behind walls, under flooring, and in damp insulation. Mold spores can quickly spread throughout your home, leading to health risks for your family. Professional restoration companies use moisture meters and infrared cameras to detect hidden moisture and apply antimicrobial treatments to prevent mold growth.
Step 6: Begin Restoration and Repairs
Once the water is removed and the area is dried, you can start the restoration process. Depending on the severity of the water damage, this may involve:
- Replacing drywall, flooring, and insulation
- Repairing or replacing damaged cabinetry, furniture, and fixtures
- Restoring personal belongings like clothing, electronics, and important documents
A professional restoration team can guide you through these steps, ensuring that your home is fully repaired and safe for you to return.
Step 7: Take Preventive Measures
After your home is restored, take steps to prevent future water damage. Regularly inspect your home for leaks, particularly in the roof, windows, and plumbing. Invest in a sump pump if you live in a flood-prone area, and consider waterproofing your basement to reduce the risk of future flooding.
Water damage can be overwhelming, but taking swift action can mitigate its effects and reduce the overall restoration costs. By identifying the source, removing water quickly, and working with professional restoration experts, you can restore your home and prevent long-term damage like mold growth.
If your home has suffered water damage, don’t wait. Contact our water damage restoration team for fast and reliable service to help you recover quickly and safely.
As a trusted leader in the restoration industry, SERVPRO of Framingham has the advanced training and equipment needed to restore your home and business. Give us a call at (508) 370-4400
 February is American Heart Month—a time to raise awareness about cardiovascular health and how to protect your heart.


 24/7 Emergency Service


